
Mastering Mobile Logic Board Diagnosis: How to Trace Short Circuits & Motherboard Faults Like a Pro (2026 Guide)
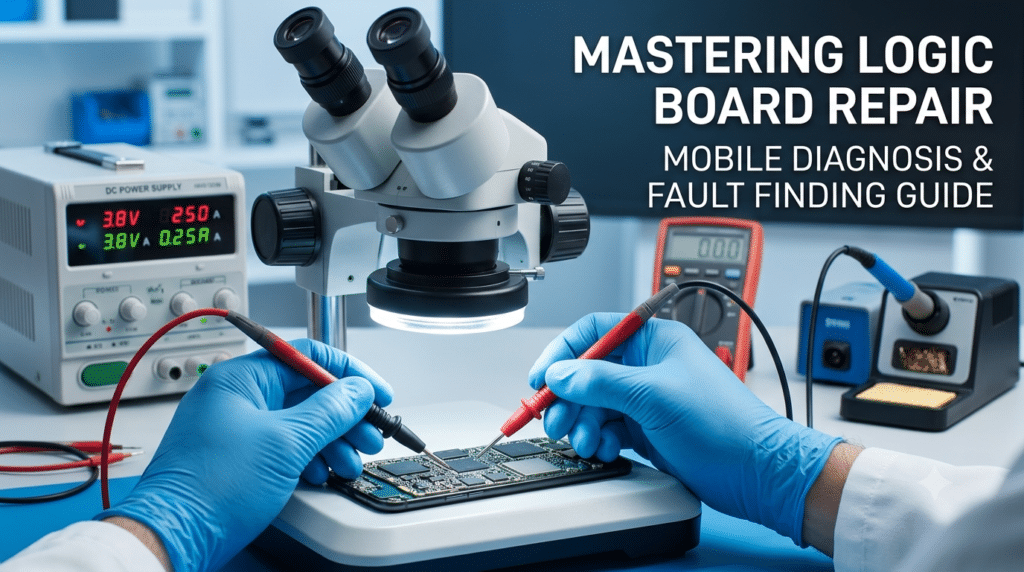
Cracking the Code: Advanced Smartphone Motherboard Repair & Logic Board Troubleshooting Masterclass (2026 Edition)
The smartphone repair industry has evolved dramatically over the last few years. Basic screen replacements and battery swaps are no longer enough to build a lucrative, future-proof career. Today, the real demand and high profit margins lie in advanced chip-level troubleshooting and micro-soldering.
When a smartphone or iPhone completely fails to turn on, suffers severe water damage, or develops a sudden short circuit on the logic board, generic repair shops often turn customers away. However, certified chip-level technicians who understand schematic reading, power rail diagnostics, and thermal imaging can pinpoint and fix complex motherboard faults within minutes.
In this comprehensive guide, we break down the step-by-step diagnostic workflow used by expert mobile technicians to trace short circuits, read schematics, and fix dead smartphones.
What Causes Short Circuits on Smartphone Logic Boards?
A short circuit occurs when electrical current strays from its intended path due to low resistance between two points in a circuit. On a densely packed mobile motherboard, components are arranged in micrometers, making them vulnerable to several common issues:
Liquid / Water Damage: Minerals in water conduct electricity, causing immediate short circuits and corrosion across motherboard components.
Overcharging & Faulty Chargers: High voltage surges through cheap or non-certified chargers can blow input capacitors, charging ICs, or power management ICs (PMIC).
Physical Impact: Dropping a device can crack micro-solder joints beneath BGA (Ball Grid Array) chips or fracture tiny surface-mount capacitors.
Component Degradation: Aging SMD (Surface Mount Device) capacitors can break down internally and bridge positive lines directly to ground.
Essential Diagnostic Tools for Chip-Level Mobile Repair
To trace motherboard shorts accurately without damaging surrounding components, a modern technician relies on specialized laboratory equipment:
| Diagnostic Tool | Primary Function in Logic Board Repair |
|---|---|
| Digital Multimeter (DMM) | Measuring diode value, resistance, and continuity to locate grounded lines. |
| DC Power Supply (DCPS) | Injecting voltage, monitoring current consumption spikes, and detecting dead shorts. |
| Microscope (Trinocular) | Visual inspection of corrosion, burnt ICs, cracked joints, and micro-soldering tasks. |
| Thermal Camera / Rosin Pen | Identifying exact failing components by detecting abnormal heat generation under voltage. |
| Schematics & Bitmap Software | (e.g., ZXW, Borneo Schematics, JCID) Mapping lines, understanding power delivery networks, and locating test points. |
Step-by-Step Logic Board Fault Finding Workflow
When a dead mobile phone arrives at your bench, following a structured diagnostic sequence ensures fast and accurate repair without unnecessary component removal.
[Visual Inspection] ➔ [Primary Power Line Check (VBAT / VPH)] ➔ [Secondary Rail Testing] ➔ [Short Detection (Thermal/Rosin)] ➔ [IC / Component Replacement]
Step 1: Thorough Visual Inspection Under a Microscope
Before connecting power to the board, inspect both sides under a trinocular microscope. Look for:
Green or white oxidation marks indicative of water damage.
Discolored, swollen, or burnt capacitors and inductors.
Physical cracks on critical ICs like PMIC, Audio IC, or Wi-Fi modules.
Step 2: Cold Testing (Diode Mode Check)
Using your digital multimeter in Diode Mode (Red probe connected to Ground, Black probe on the test point):
Check main battery connector lines (
VBATorVBUS).Measure the main power line (such as
VPH_PWRorVDD_MAINin iPhones).Normal Behavior: You should get a diode value reading (typically between 0.250V to 0.600V depending on the line).
Full Short: A reading of
0.000or a continuous beep indicates a direct bridge to Ground.
Step 3: Hot Testing with DC Power Supply
Connect the logic board to a regulated DC Power Supply set to the nominal battery voltage (3.8V – 4.2V):
Auto-Consumption (Full Short): If current jumps immediately (e.g., 2A – 5A) before pressing the power button, there is a primary power line short.
No Consumption on Power Press: Indicates an open circuit, blown fuse line, broken power switch line, or dead PMIC.
Pulse / Loop Consumption: If the current rises to 50mA–150mA and drops repeatedly, it usually points to secondary boot rail faults or CPU/RAM communication errors.
Step 4: Pinpointing the Shorted Component
Once a shorted rail is identified, inject a safe voltage (matching the line specification) into that rail using your DC Power Supply:
Rosin Technique: Coat the suspected area with rosin smoke (creating a white powder layer). As voltage is applied, the shorted component heats up instantly, melting the rosin white layer first.
Thermal Camera Detection: A thermal imaging device instantly highlights the exact micro-component generating abnormal heat in real-time.
Why Is Schematic Reading Essential for Modern Technicians?
Gone are the days when mobile repair was based on guesswork or simple jumper wires. Modern iPhones and Android devices feature multi-layer PCBs (Printed Circuit Boards) with thousands of micro-components.
Mastering schematic diagrams and bitmap utilities allows you to:
Trace voltage signals from input connectors to output ICs.
Identify component values (capacitance, resistance, inductance) for precise replacement.
Locate alternative test points when PCB traces are damaged or torn.
Frequently Asked Questions (FAQs)
Q1. What is the difference between primary short and secondary short on a logic board?
A primary short occurs on the main power lines directly connected to the battery or charging input (like VBAT, VBUS, or VPH_PWR). It causes immediate high current draw when power is connected. A secondary short occurs on lines outputted by the Power Management IC (PMIC) after the power button is pressed, affecting specific subsystems like display, camera, or Wi-Fi.
Q2. Can I learn mobile chip-level repair without prior electronics knowledge?
Yes! Modern chip-level training programs start from fundamental electronics concepts (voltage, current, component identification) and progress step-by-step to advanced schematic reading, BGA reballing, and micro-soldering with practical lab sessions.
Q3. How long does it take to become a skilled chip-level mobile technician?
With hands-on practical training under expert instructors, a student can master chip-level diagnostic tools, micro-soldering, and logic board troubleshooting within 4 to 8 months.
Q4. Is there high demand for chip-level mobile technicians in Kerala and abroad?
Absolutely. With millions of smartphones sold each year and device prices rising, customers prefer repairing complex motherboard faults over buying new devices. Furthermore, certified chip-level technicians are in extremely high demand across Gulf countries (UAE, Qatar, Saudi Arabia) offering lucrative salary packages.
Start Your Professional Mobile Technology Career at NexGen Institute
Mastering chip-level diagnostics requires hands-on experience under expert guidance using industry-standard equipment.
NexGen Institute of Mobile Technology in Kochi, Kerala, is the state’s leading government-approved mobile repair training center. With state-of-the-art diagnostic labs, expert instructors, and 100% placement assistance, NexGen prepares you for a rewarding career in technical servicing or entrepreneurship.
Popular Courses at NexGen Institute:
8-Month Course: Professional Diploma in Advanced Smartphone & iPhone Chip-Level Training
6-Month Course: Professional Diploma in Smartphone Chip-Level Training
4-Month Course: Advance Smartphone Chip-Level Training Course
Government Recognitions: NSDC Approved | STED Council Certified | Skill India Recognized
📍 Get in Touch with NexGen Institute Today!
🏢 Address: Second Floor, NKM Arcade, Ponnurunni, Vyttila, Kochi, Ernakulam, Kerala – 682019 (Near Vyttila Mobility Hub)
📞 Phone / WhatsApp: +91 90618 82000
🌐 Website: nexgeninstitute.in
✉️ Email: nexgeninstitutecochin@gmail.com
⏰ Working Hours: Open Daily | 9:00 AM – 6:00 PM