
The Ultimate Guide to Mobile Water Damage Repair and Logic Board Recovery: A Professional Technician’s Blueprint
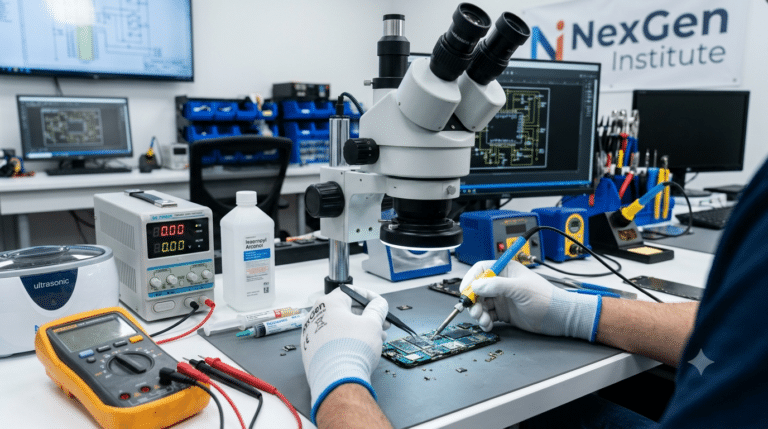
Liquid ingress remains one of the most frequent and complex challenges faced by mobile repair technicians worldwide. Whether it is fresh water, salt water, or chemical liquids, fluid exposure triggers rapid electrochemical reactions on high-density printed circuit boards (PCBs). For smartphone technicians looking to deliver high success rates, understanding liquid damage repair at a microscopic and circuit level is an essential skill.
While basic technicians often rely on outdated drying methods or temporary alcohol cleaning, professional hardware repair engineers approach liquid damage using systematically structured diagnostic frameworks, power rail mapping, and precise micro-soldering procedures.
Understanding Liquid Ingress & Electrochemical Corrosion
When liquid enters a powered smartphone, damage occurs through two distinct processes: immediate electrical shorting and continuous chemical oxidation. Modern lithium-ion batteries constantly maintain positive voltage (V_BAT) across major power rails, even when the device is powered off.
Liquid Exposure + Live Voltage + Diverse Metals = Accelerated Electrolytic CorrosionShort Circuits: High-conductivity liquids bridging capacitor pads or power rails lead to localized thermal surges, blown inductors, or melted IC packages.
Galvanic Corrosion: Electric current passing through wet traces rapidly strips copper, tin, and gold plating, causing open circuits and broken trace connections.
Sub-BGA Residue: Liquid trapped beneath Ball Grid Array (BGA) integrated circuits creates silent short circuits across ground and signal balls.
Step-by-Step Liquid Damage Recovery Workflow
Step 1: Immediate Safety & Complete Disassembly
The first phase of liquid recovery requires instant power isolation. Continuing to press power buttons or inserting a charger while liquid is present drastically increases total logic board destruction.
Disconnect the battery terminal immediately under ESD-safe ESD protection.
Remove all shielding cans using regulated hot air or precision cutters.
Inspect flex cables, camera connectors, and display interfaces under a stereo microscope for pin burn marks.
Step 2: Ultrasonic Cleaning and Chemical Deoxidation
Surface cleaning with isopropyl alcohol (IPA) alone is insufficient for liquid trapped under BGAs. Professional labs utilize ultrasonic baths equipped with specialized PCB cleaning solvents.
Submerge the bare board in an ultrasonic cleaner filled with 99.9% electronic-grade IPA or aqueous flux-cleaning agents.
Run a multi-stage ultrasonic cavitation cycle (35–40 kHz) for 5 to 8 minutes to cavitate trapped deposits underneath power management ICs (PMICs).
Dehydrate the PCB completely in a controlled heating oven at 60°C to 70°C for 30 minutes to eliminate hidden moisture.
Diagnosing Short Circuits with Advanced Equipment
Once the PCB is clean and dry, technicians must measure power lines before attempting to boot the device. Connecting raw power without testing can destroy replacement parts or burn secondary circuits.
+-----------------------------------------------------------------------+
|                       POWER RAIL DIAGNOSIS SETUP                       |
|                                                                       |
|  [ DC Power Supply ] -------> [ Short Killer / Thermal Imager ]       |
|            |                                |                         |
|            v                                v                         |
|   Check V_BAT & VPH_PWR             Pinpoint Heated Capacitor         |
+-----------------------------------------------------------------------+
1. Diode Mode Multimeter Checks
Measure diode mode values against a known good reference board:
Test major power rails:
V_BAT,VPH_PWR/VDD_MAIN, and CPU buck converters.A reading of
0.000Vindicates a direct short to ground, while significantly lower-than-normal values indicate high-resistance leaks.
2. Thermal Imaging and DC Power Injection
Finding a tiny 0201 shorted capacitor among hundreds of components on a multi-layer board requires modern diagnostic technology:
Connect the board to a 4-digit laboratory DC power supply set to nominal rail voltage with a restricted current limit (1A to 2A).
Utilize an infrared thermal camera or thermal rosin flux application to locate exact heat zones instantly.
Identify whether a passive decoupling capacitor or an active IC (such as the main PMIC or audio codec) is drawing the fault current.
To learn more about advanced diagnostic equipment and multi-layer board fault finding, explore our comprehensive guide on Mastering Advanced Mobile Motherboard Diagnostics & Fault Finding.
Chip-Level Micro-Soldering & BGA Reballing
When corrosion degrades BGA solder joints underneath crucial components like the Power Management IC (PMIC), Wi-Fi module, or Baseband IC, complete reballing is mandatory.
       [ Unsoldering Damaged IC ]
                   │
                   ▼
     [ Board Pad Cleaning & Wicking ]
                   │
                   ▼
     [ Stencil Placement & Paste Application ]
                   │
                   ▼
     [ Reflow & Precise Component Reseating ]
IC Removal: Apply liquid flux and uniform hot air reflow at 330°C–350°C to lift the affected IC safely without lifting PCB solder pads.
Pad Restoration: Clean leftover solder using leaded solder wire and copper desoldering braid. Rebuild destroyed traces or micro-vias using enamel jumper wire.
Reballing: Align a precision stencil over the IC, apply solder paste (63/37 or SAC305), and heat evenly until uniform solder spheres form.
Reseating: Position the reballed IC onto the motherboard using high-grade flux and reflow until surface tension snaps the IC perfectly into position.
Mastering these micro-soldering techniques requires hands-on laboratory practice under expert guidance. Check out the hands-on learning modules offered in our Smartphone Chip-Level Training Courses to understand real-world bench procedures.
Preventative Measures & Quality Testing
Before certifying a water-damaged device for long-term customer use, thorough stress testing and functional verification are necessary:
Current Consumption Profiling: Observe boot-up power curves on a DC power supply to confirm normal CPU execution and sleep modes.
RF & Network Validation: Test baseband performance, Wi-Fi signal strength, and cellular band connectivity.
Display and Touch Subsystem Check: Verify backlight boost circuits and touch controller communications.
Conclusion
Mobile water damage repair has evolved from simple cleaning into an advanced domain of micro-electronics engineering. Technicians equipped with thermal imaging tools, diode mode troubleshooting methodologies, and micro-soldering expertise can achieve exceptional recovery rates on damaged mobile devices. Building these advanced skill sets prepares technicians for rewarding, high-income career opportunities in the fast-growing electronics repair market.
If you are eager to master advanced chip-level troubleshooting, motherboard trace repair, and professional micro-soldering from industry experts, consider advancing your skills at NexGen Institute of Mobile Technology, Kerala’s top-rated practical training center.
Frequently Asked Questions (FAQ)
Q1: Can a water-damaged phone logic board be fully repaired?
Yes. With proper ultrasonic cleaning, diode mode short detection, thermal imaging, and chip-level micro-soldering, even severely corroded smartphone logic boards can be fully restored to functional condition.
Q2: Why is putting a water-damaged phone in rice ineffective?
Rice does not prevent internal galvanic corrosion or clean trapped liquid beneath high-density BGA chips. Moisture trapped inside accelerates circuit degradation while the battery remains connected. Professional disassembly and ultrasonic cleaning are required.
Q3: How do technicians find short circuits on water-damaged motherboards?
Technicians use digital multimeters in diode mode alongside DC laboratory power supplies and infrared thermal cameras (or rosin flux technique) to detect heat caused by shorted capacitors or damaged integrated circuits.
Q4: What tools are required to start professional liquid damage repairs?
Essential tools include a stereo binocular microscope, an adjustable hot air rework station, a precision soldering iron, a 4-digit DC power supply, an ultrasonic cleaner, a thermal camera, and digital multimeters.
Contact Details
Institute: NexGen Institute of Mobile Technology
Address: Second Floor, NKM Arcade, Ponnurunni, Vyttila, Kochi, Ernakulam, Kerala 682019
Phone: +91 90618 82000
Email: nexgeninstitutecochin@gmail.com
Website: https://nexgeninstitute.in/